はじめに
かなり前にこういう記事を書いた。
社内に導入したので導入メモ程度だったんだけど、検索からのアクセスが異常に多い。phpipamとgoogle検索するとこの記事がなんと3番目に表示される。(記事執筆現在)1位は公式、2位は構築時に参考にしたブログだ。
需要があるということでもう一度自分の環境でインストールしてまとめること、さらにそれをvagrantで自動化すること、そして実際に機能の紹介までしていきたいと思う。今回はインストール編です。
phpipam
あらためてphpipamについて説明します。
会社でのIPアドレス管理はexcelのような帳票、もしくはwikiによる管理者手動更新がほとんどではないでしょうか。私も社内で1サブネット分の管理を任されてるんですが、社内WANにつながるものなので比較的しっかり管理しなければなりません。どうしても手動管理だと管理者の負担もあがるし、利用者がwikiを更新する形だと「記入漏れ」「削除漏れ」が発生して、実態と齟齬がでて使おうとしたら競合したり、不要に予約されてIPを圧迫したりします。
phpipamには以下の特徴があります。
- ユーザ認証によって誰がいつ使ったか、変更したかのチェンジログが残るため、特定がしやすい
- ping scan機能によりどのIPがオンラインか分かる
→勝手に使われてないかのチェックに使える - IPアドレスと一緒に使っているマシンの情報も記録できるので、機器管理も同時に行える
が大きなメリットでしょうか。
ただまだまだ日本語の情報が少ないです。導入してとても役に立っているので貢献の意味をこめて紹介します。(本当はバグレポートあげたりコミットしたりしたいね、OSSの時代だし。。。)
環境
Mac上のvagrantで作ったCentOS6.6に導入する。vagrantについての説明は省略するが、CentOS6.6であれば同じコマンドを打てば導入できるはずだ。
(ちなみにvagrantのエラーログがドイツ語になるのって何が根本原因か分からないんですよね。。。)
Vagrant
vagrantを使わない人は読み飛ばしていただきたい。
Box
vagrant box list
MacBook-Air:techstudy take$ vagrant box list
CentOS66   (virtualbox, 0)
CentOS7    (virtualbox, 0)
ubuntu1404 (virtualbox, 0)
CentOS66のBoxはここから取得した。
A list of base boxes for Vagrant - Vagrantbox.es
Vagrantfile
VAGRANTFILE_API_VERSION = "2"

Vagrant.configure(VAGRANTFILE_API_VERSION) do |config|
  # All Vagrant configuration is done here. The most common configuration
  # options are documented and commented below. For a complete reference,
  # please see the online documentation at vagrantup.com.

  # Every Vagrant virtual environment requires a box to build off of.
  config.vm.box = "CentOS66"

(省略)

  config.vm.define :phpipam do | phpipam |
    phpipam.vm.hostname = "phpipam"
    phpipam.vm.network :private_network, ip: "192.168.33.16"#, virtualbox__intnet: "intnet"
    phpipam.vm.provision :shell, :path => "phpipam.sh"
  end

end
特にひねりのない普通のVagrantfileだ。省略部分には以前構築した、webサーバ、haproxy、rabbitmq用のVMの設定があり、192.168.33.10〜15までのipを使う。今回はこのipをphpipamで管理してみたい。provisionはVM作成後に実行されるスクリプトだ。今回この内容がそのまま導入内容となる。
provision
phpipam.sh
sudo su
yum -y install php php-gd php-mbstring php-mysql php-pear mysql-server httpd
cp /vagrant/phpipam/my.cnf /etc/my.cnf
cp /vagrant/phpipam/php.ini /etc/php.ini
cp /vagrant/phpipam/httpd.conf /etc/httpd/conf/httpd.conf
service mysqld start
chkconfig mysqld on
mysql -uroot -e "set password for root@localhost=password('PassWord');"
tar xvf /vagrant/phpipam/phpipam-1.1.010.tar
mv phpipam/{.htaccess,api,css,db,functions,index.php,install,js,misc,site,upgrade,config.php} /var/www/html/
chown -R apache:apache /var/www/html/
service httpd start
chkconfig httpd on
setenforce 0
cp /vagrant/phpipam/selinux /etc/sysconfig/selinux
やってる内容は以下
- 必要パッケージのインストール
- 設定ファイルの配置
- mysqlサービスの起動、サーバ起動時オン
- mysqlのパスワード設定(PassWord、というパスワードを設定)
- phpipamを解凍して配置
- /ver/www/html以下の所有者をapacheに変更
- httpサービスの起動、サーバ起動時オン
- selinuxの設定変更
設定ファイル置き換え部分は、次に示す設定ファイルの該当箇所を編集すれば良い。
設定ファイル
長いものは変更部分のみ記載する。
my.cnf
[mysqld]
datadir=/var/lib/mysql
socket=/var/lib/mysql/mysql.sock
user=mysql
# Disabling symbolic-links is recommended to prevent assorted security risks
symbolic-links=0

character-set-server = utf8

[mysqld_safe]
log-error=/var/log/mysqld.log
pid-file=/var/run/mysqld/mysqld.pid
character-set-serverをutf8に設定した。 mysqlが返す文字コードをutf8で返すということですね。
php.ini
[Date]
; Defines the default timezone used by the date functions
; http://www.php.net/manual/en/datetime.configuration.php#ini.date.timezone
date.timezone = Asia/Tokyo
date.timezoneをtokyoに設定。 phpのtimezone設定ですね。これを基準に時刻を取得するのでしょう。
httpd.conf
#
# DocumentRoot: The directory out of which you will serve your
# documents. By default, all requests are taken from this directory, but
# symbolic links and aliases may be used to point to other locations.
#
DocumentRoot "/var/www/html"

#
# Each directory to which Apache has access can be configured with respect
# to which services and features are allowed and/or disabled in that
# directory (and its subdirectories).
#
# First, we configure the "default" to be a very restrictive set of
# features.
#
<Directory />
    #Options FollowSymLinks
    Options None
    #AllowOverride None
    AllowOverride All
</Directory>

#
# Note that from this point forward you must specifically allow
# particular features to be enabled - so if something's not working as
# you might expect, make sure that you have specifically enabled it
# below.
#

#
# This should be changed to whatever you set DocumentRoot to.
#
<Directory "/var/www/html">

#
# Possible values for the Options directive are "None", "All",
# or any combination of:
#   Indexes Includes FollowSymLinks SymLinksifOwnerMatch ExecCGI MultiViews
#
# Note that "MultiViews" must be named *explicitly* --- "Options All"
# doesn't give it to you.
#
# The Options directive is both complicated and important.  Please see
# http://httpd.apache.org/docs/2.2/mod/core.html#options
# for more information.
#
    Options FollowSymLinks

#
# AllowOverride controls what directives may be placed in .htaccess files.
# It can be "All", "None", or any combination of the keywords:
#   Options FileInfo AuthConfig Limit
#
    AllowOverride None

#
# Controls who can get stuff from this server.
#
    Order allow,deny
    Allow from all

</Directory>
設定ファイルに説明が書いてありますね。
AllowOverrideは.htaccessによる上書きを許可するかどうか。 OptionのFollowSymLinksはOwnerであればシンボリックリンクを許可する。
実はこのapacheの設定で少しハマって、PermissionDeniedが出てました。
こう見ると/var/www/htmlに関する項目が2箇所あります。上に出てくるほうが効くんでしょうかね。。。
selinux
# This file controls the state of SELinux on the system.
# SELINUX= can take one of these three values:
#     enforcing - SELinux security policy is enforced.
#     permissive - SELinux prints warnings instead of enforcing.
#     disabled - No SELinux policy is loaded.
SELINUX=permissive
# SELINUXTYPE= can take one of these two values:
#     targeted - Targeted processes are protected,
#     mls - Multi Level Security protection.
SELINUXTYPE=targeted
permissiveでもdisabledでもお好きなほうを。てかselinuxが有効活用されてる話聞いたことないな。
アクセス
http://ipアドレス
勝手に?page=installにリダイレクトされます。
phpipamのインストール
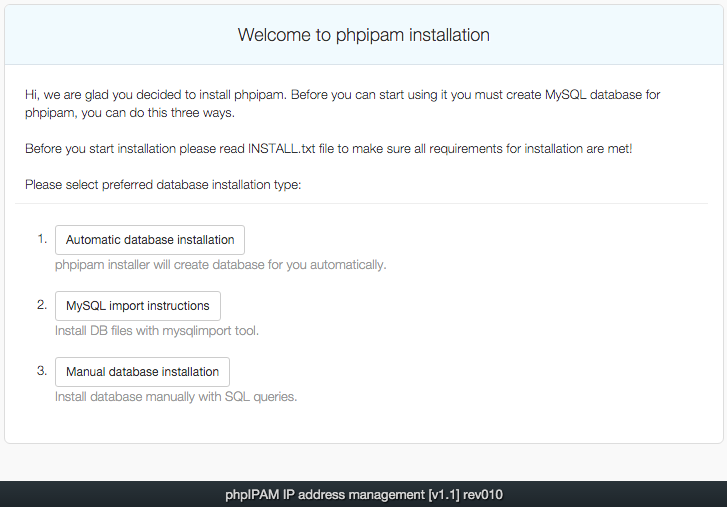
やぁ!phpipamを使おうとしてくれて嬉しいよ!phpipamを使う前にmySQLでデータベースを作らなくちゃいけない。3通りの方法を選べるよ。
インストールをはじめる前に、必要な要件を満たすために必ずINSTALL.txtは読んでくれよな
- 自動インストール
- 構成ファイルをインポートする
- 全て手動でインストールする
ボタンをクリックすれば手順が書かれてある。今回は1を選択した。
(余談だけどこのボタンがクリックできると思わなくてハマった思い出がある)
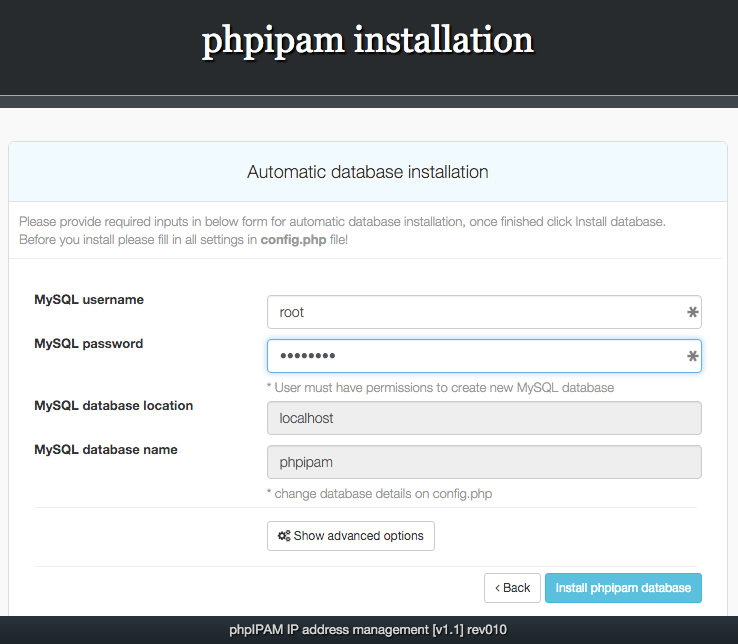
mysqlに設定したユーザとパスワードを入力する。今回の例ではPassWord。
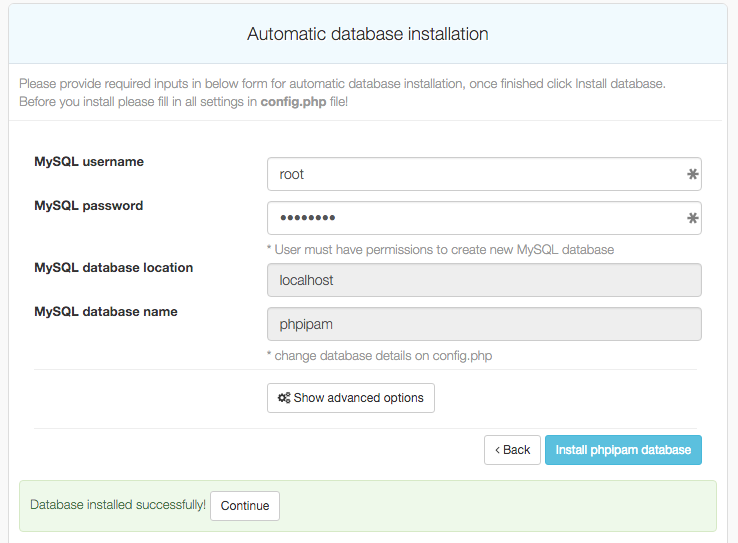
成功したらcontinue
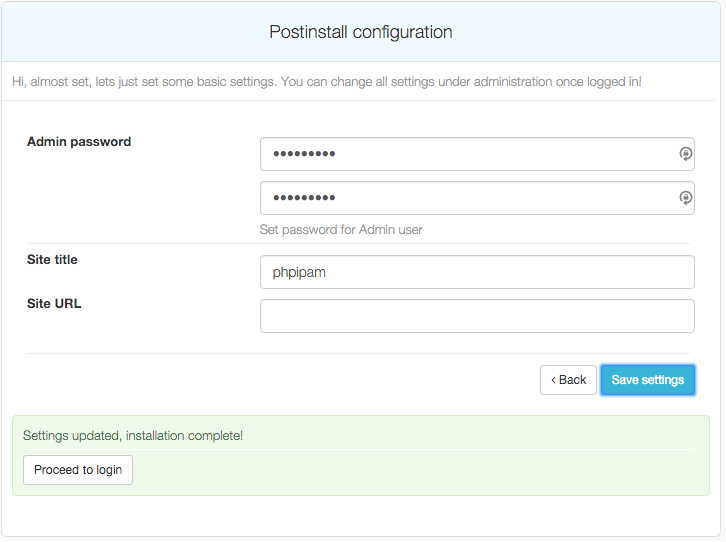
adminのパスワードを入れる。READMEに書いてあるが、デフォルトはipamadmin。
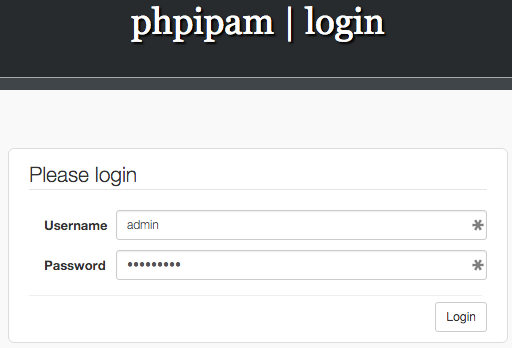
ログイン画面に行くのでデフォルトユーザ(admin/ipamadmin)でログイン
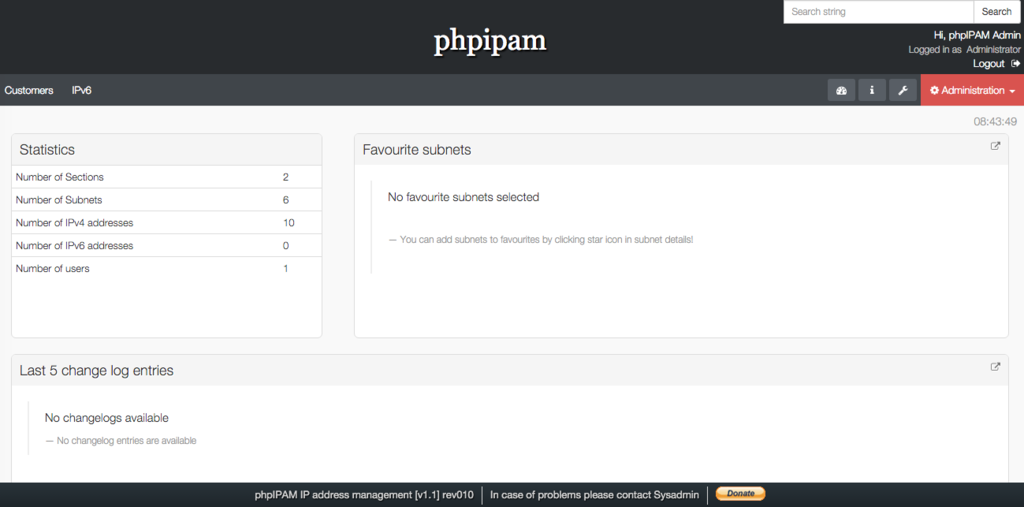
成功!!!
終わりに
apacheとmysql、phpが入れば導入はそんなに難しくない。丁寧にドキュメントも書かれてある。
ただvagrantで書いたけど後半(大した手間じゃないにしても)DBのインストールはGUI手動で自動化できないので、完了後のsnapで残しておこうかな。。。(基本vagrantで作ったVMは使わないときはdestroyする)
次回は使い方を解説します。メインとなるIPの管理方法、csvインポート、ユーザ・権限まわり。
参考
http://www.kurobuti.com/blog/?p=7217
このブログがなければできてないです。。。感謝。